
This lesson is made with PSPX9
But is good with other versions.
© by SvC-Design
Materialen Download :
Here
******************************************************************
Materials:
AlphaChannelElSalvador.pspimage
ataco-el-salvador.jpg
crossmsk_LH.jpg
ElSalvadorMistSoxiki.pspimage
Image11.png
kisspng-el-salvador.png
tituloElSalvadorSoxikibem.png
******************************************************************
Plugin:
Effects - Plugins - AP [Utillity] - Reflections
Effects - Plugins - AP [Lines] - SilverLining
Effects - plugins - Eye Candy 5 Impact - Motion Trail
******************************************************************
color palette
:
******************************************************************
methode
When using other tubes and colors, the mixing mode and / or layer coverage may differ
******************************************************************
General Preparations:
First install your filters for your PSP!
Masks: Save to your mask folder in PSP, unless noted otherwise
Texture & Pattern: Save to your Texture Folder in PSP
Selections: Save to your folder Selections in PSP
Open your tubes in PSP
******************************************************************
We will start - Have fun!
Remember to save your work on a regular basis
******************************************************************
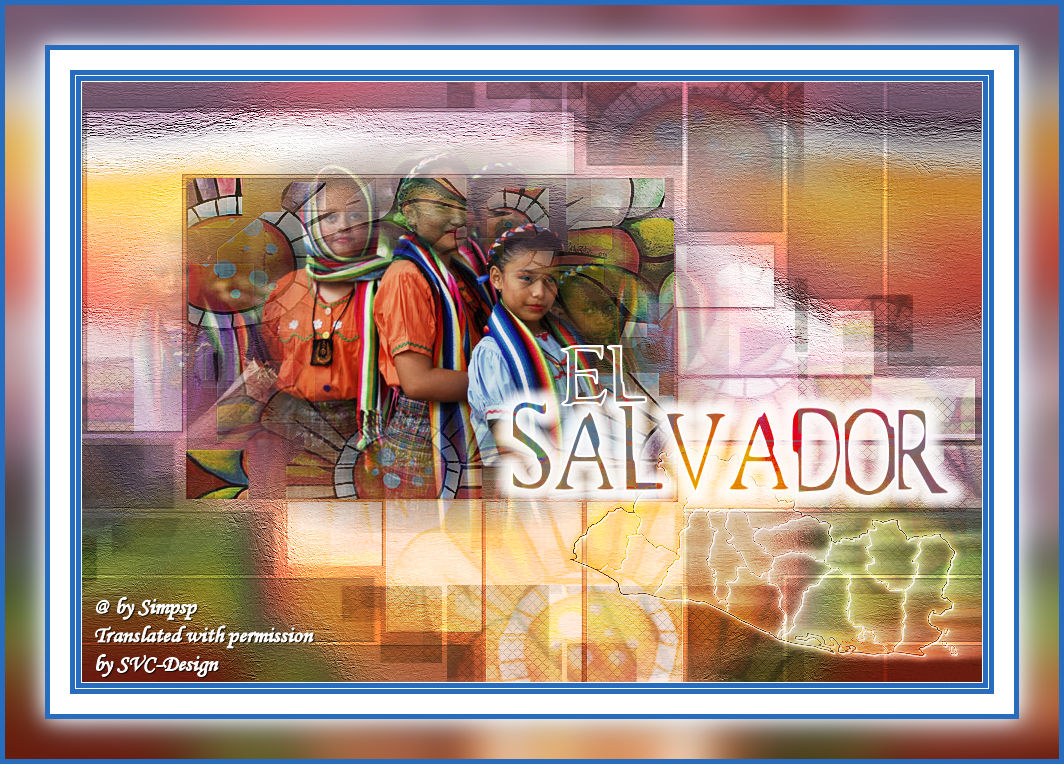
1
Open the file "AlphaChannelElSalvador"
Windows - Duplicate (Shift + D) - Close the original and continue working with the copy
Selections - select all
Open the image "ataco-el-salvador"
Edit - copy
Activate your work
Edit - paste into selection
Selections - select none
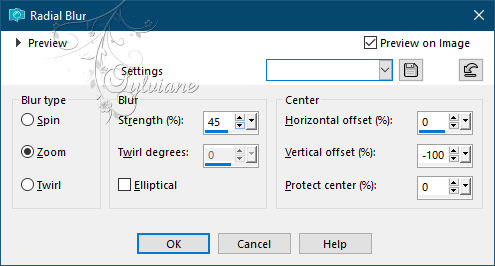
2.
Adjust - Blur - Radial Blur
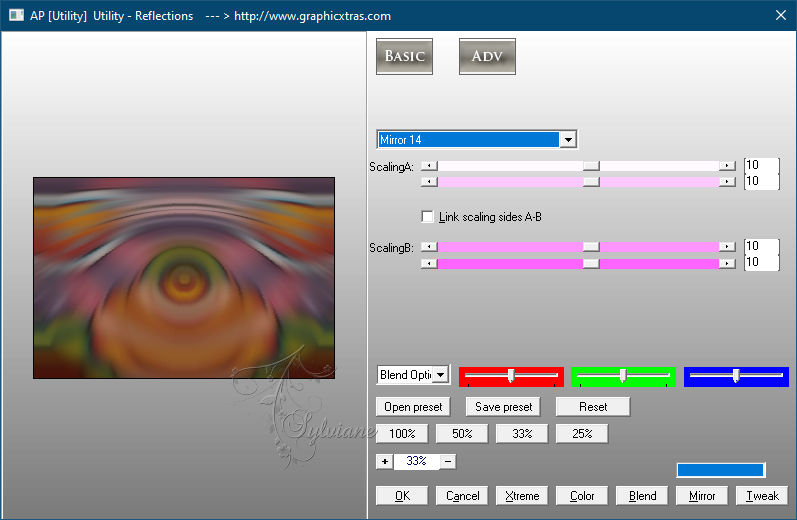
3.
Effects - Plugins - AP [Utillity] - Reflections
4.
Effects - Art Effects - Brush Strokes
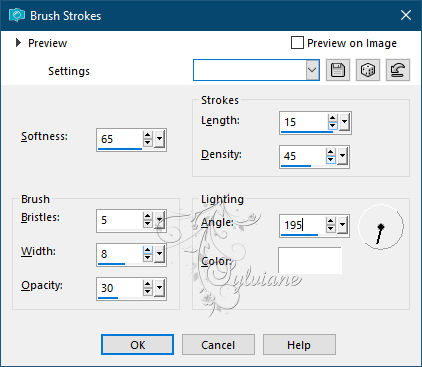
5.
Layers - new raster layer
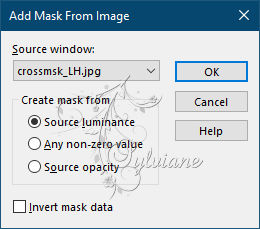
Fill the layer with color:#ffffff
Layers - new mask layer - from image - crossmsk_LH.jpg
Effects - Edge Effects - Enhance
Layers - merge - merge group
Layer palette - set the blend mode to overlay
6.
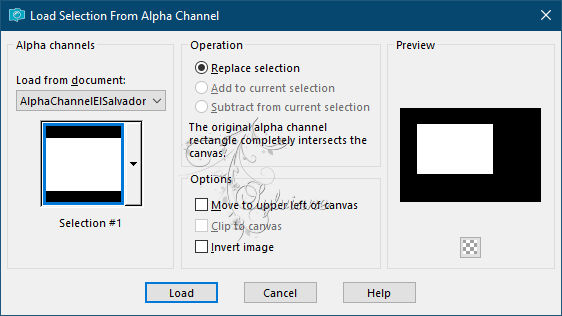
Selections - load / save selection - load selection from alpha channel "# 1"
Layers - new raster layer
Open the tube "ElSalvadorMistSoxiki"
Edit - copy
Activate your work
Edit - paste into selection
Layers - arrange - down
Layer palette - set the blend mode to Dodge
Effects - Edge Effects - Enhance
Selections - select none
7.
Selections - load / save selection - load selection from alpha channel "# 2"
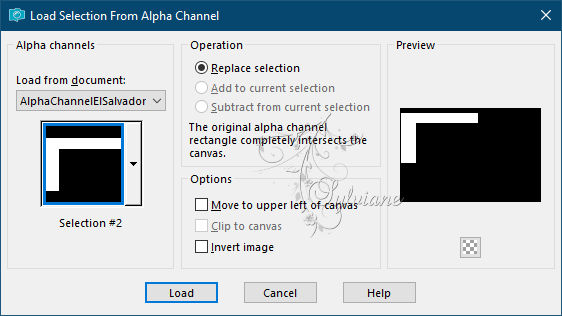
Layers - new raster layer
Fill the selection with color:#ffffff
Layer palette - set the blend mode to overlay
Selections - select none
8.
Selections - load / save selection - load selection from alpha channel "# 3"
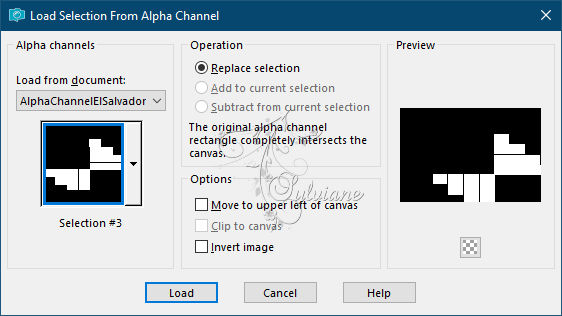
Layers - new raster layer
Fill the selection with color:#ffffff
Layer palette - set the blend mode to overlay
9.
Layers - new raster layer
Open the image "ElSalvadorMistSoxiki"
Edit - copy
Activate your work
Edit - paste into selection
Layer palette - set the blend mode to screen
Selections - select none
10.
Layers - Duplicate
Effects - Image Effects - Seamless Tiling
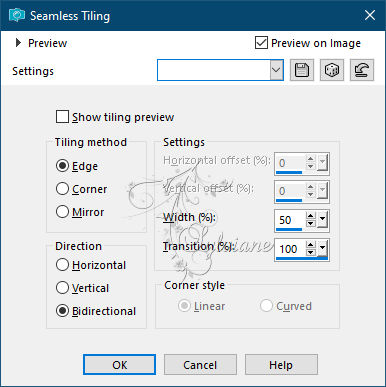
Layer palette - set the blend mode to multiply and the opacity to 50
11.
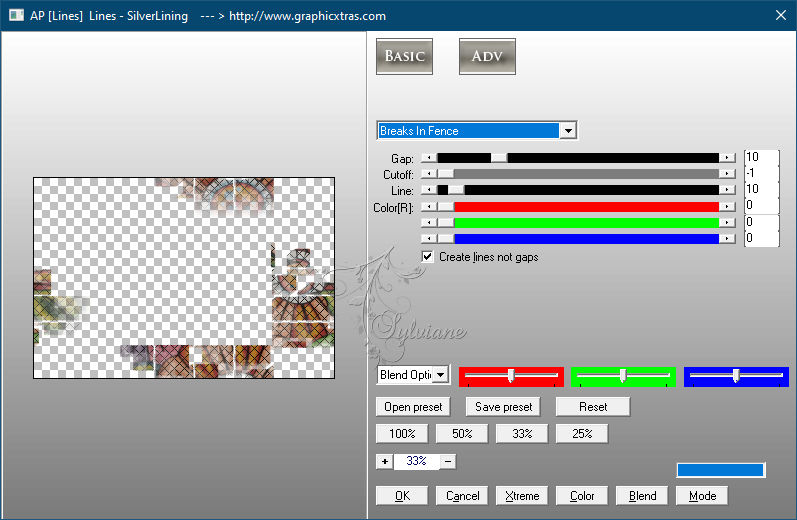
Effects - Plugins - AP [Lines] - SilverLining
12.
Open the tube "kisspng-el-salvador"
Edit - copy
Activate your work
Edit - paste as a new layer
Activate selection tool (Press K on your keyboard)
And enter the following parameters:
Pos X :488 – Pos Y : 363
Press M
Layer palette - set the blend mode to luminance
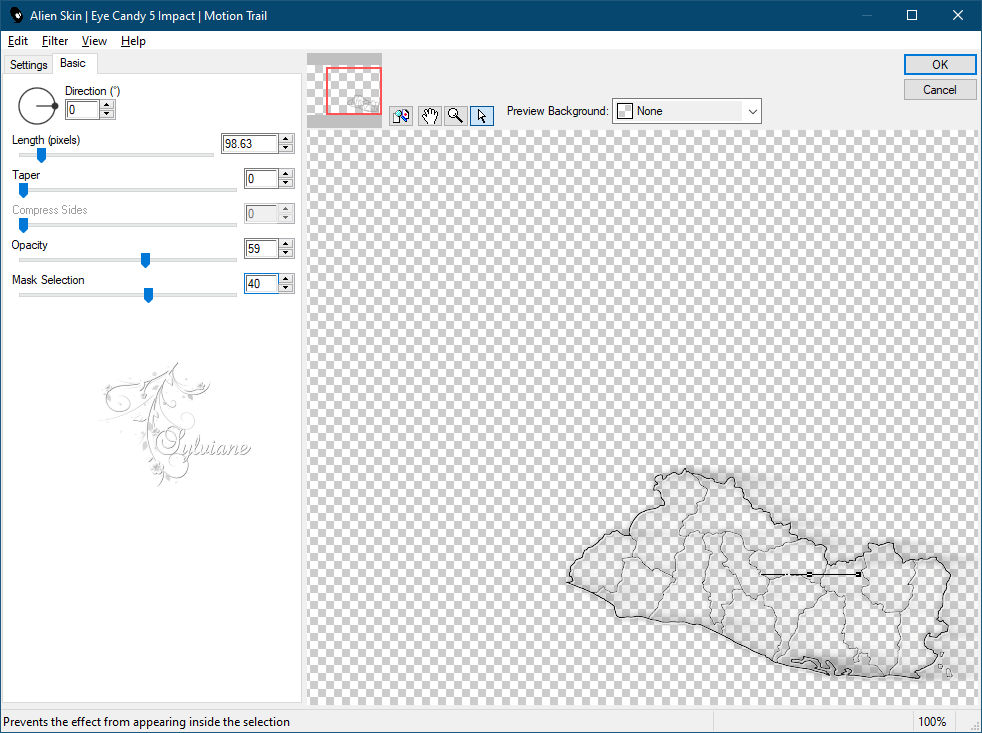
Effects - plugins - Eye Candy 5 Impact - Motion Trail - default with these settings
13.
Open the tube "Image11"
Edit - copy
Activate your work
Edit - paste as a new layer
Layers – arrange – bring to top
Slide the tube into place
14.
Open the tube "tituloElSalvadorSoxikibem"
Edit - copy
Activate your work
Edit - paste as a new layer
Activate selection tool (Press K on your keyboard)
And enter the following parameters:
Pos X :410 – Pos Y :263
Press M
Layer palette - set the blend mode to luminance
15.
Layers - merge - merge all
Edit - copy
16.
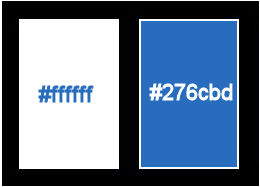
Image - add border - 1 pixel #ffffff
Image - Add Border - 5 pixel # 276cbd
Image - add border - 1 pixel #ffffff
Image - Add Border - 5 pixel # 276cbd
Image - add border - 20 pixel #ffffff
Image - Add Border - 5 pixel # 276cbd
17.
Selections - select all
Image - add border - 40 pixels any color
Selections - invert
Edit - paste into selection
Adjust - Blur - Gaussian Blur - Range 20
Selections - invert
Effects - 3D Effects - Drop Shadow
0/0/100/30 color:#ffffff
Selections - select none
18.
Image - Add Border - 5 pixel # 276cbd
19.
Place your name or watermark
20.
Save as jpg
Back
Copyright Translation © 2021 by SvC-Design